Welcome to CondoCosmetics INC.

Search

Contact Us

(647) 675 5248

Welcome to CondoCosmetics INC.

Backsplash Installation: Quick Guide

Backsplash Installation

Backsplash Installation: Quick Guide

Rate this post

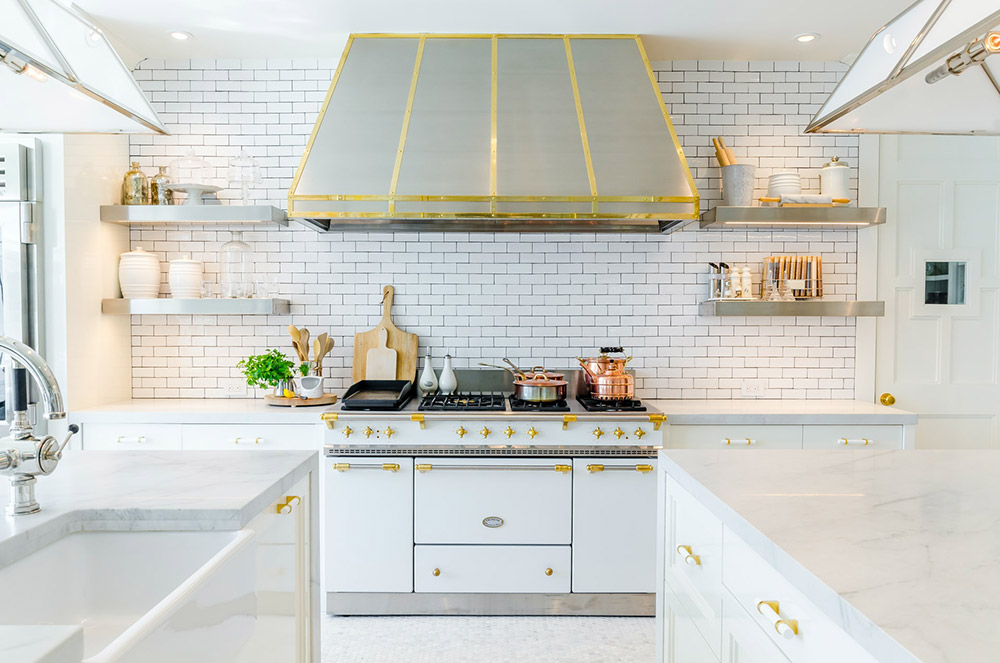
Tiling, a two-sided adhesive mat, and pre-mixed grout are the simplest backsplash installation methods. You can quickly and precisely install your tiling with the adhesive mat. Tiles come in various shapes and colors, from squares to subway tiles, so that you may design your kitchen any way you choose. Beginners should use square tiles because they are the easiest to cut and align.


Step-by-step backsplash installation

  1. Get rid of any oil or other dirt by scrubbing the wall thoroughly with the cleaner
  2. Cover the entire work area with the drop cloth and painter’s tape.
  3. In backsplash installation, painter’s tape can be used to mark the beginning and endpoints of the backsplash on the two opposite sides of the wall.
  4. Measure the area you intend to tile. Using scissors, cut the tile adhesive mat to the desired dimensions.
  5. A straight surface like a tabletop can be used as a guide for aligning one side of the adhesive mat’s back. Make sure the glue dots on the side with the thicker gap overlap the following sheet.
  6. The sheet should now be in the proper position for adhering to the wall. After that, peel the bottom half and adhere it to the wall with double-sided tape.
  7. Continue this procedure until the target area has been completely covered with the desired material. Permanently attach the sticky mat to the wall by pushing it with the rubber float.
  8. Hold it up to the wall to figure out where the tile needs to be cut.
  9. Cut the mesh in the back of the tile with a utility knife.
  10. After carefully removing the plastic covering off the adhesive mat, set each tile section on the adhesive in the appropriate location.
  11. To secure the tile once it’s in place, use a rubber float.
  12. Continue tiling the wall in this manner until it is completely covered.
  13. Using the rubber float and pre-mixed grout, fill in the spaces between the tiles. Grout should be applied diagonally until all of the gaps between the tiles are filled
  14. Use a clean sponge to remove any remaining grout from the tile by filling the bucket with water and wiping it diagonally. Make sure you remove the grout off the tile’s surface and not the grout between the tiles while wiping them down.
  15. A haze may form on the tile after 24 hours. Wipe the tile clean with a rag to remove it.


Backsplash Installation

Backsplash installation Tips

  1. Immediately after applying Loctite PL Premium adhesive, lightly mist the adhesive with a thin water mist to speed up the curing time.
  2. Plan and cut out panels to house electrical sockets and light switches. Take a measuring tape and a marker to the area where the opening will be. You should use a knife to score the entire border, making many passes with a little more pressure each time. Then, cut a 1/2- to 1-inch-deep triangle hole in the center of the panel. Cut angled cuts from the cut triangle’s edges to the corners of the border scores with sharp scissors or tin snips next. Each corner should then be bent until it breaks away.
  3. Recognize and utilize the overlap function. It’s critical to know how each panel overlaps before installing it. Each panel features two half-inch-thick, flat sides (the long flat edge is the top of the panel and the shorter flat edge is the right side of the panel). Arrange all panels in such a way that extra panels can be added to the top or right side of any panel at any time, if necessary.
  4. A place where four panels meet. Panels 2 and 3 must be notch-cut by 1/2′′ to prevent an overlap buildup, resulting in a “bump” when four panels are overlapped.


Maintenance and Care

After backsplash installation, only use warm, soapy water to clean. Avoid using abrasive chemicals or abrasive materials like scouring pads when cleaning surfaces. Instead, use a soft piece of cloth or sponge with mild soap and water. The finish can be better protected if you use high-quality polish. Contact us now!

Leave a Reply

Your email address will not be published. Required fields are marked *

Latest Posts