Isn’t Baseboard installation supposed to be simple? It’s as simple as taking measurements, cutting miters, and then nailing the trim in place. The answer is No!
Looks can be misleading if you’ve ever attempted to install a baseboard on your own. A DIY baseboard installation is frequently hampered by gaps or ill-fitting joints caused by uneven walls, uneven floors, or crooked corners. Read on and learn how you can do the baseboard installation properly.
Baseboard installation Steps
Preparatory Work: Number, Measure, and Mark
Each wall’s baseboards should be measured and cut. To accommodate miter cuts, boards that meet at outer corners should be a few inches longer than the wall.
Number each board on the back and write the same number on the wall where the board will be installed. Mark the wall studs, so you know where to start nailing the baseboard.
Determine the Height of the Baseboard
When performing baseboard installation, it is important to be careful. You can check for levelness by placing a 4-foot level next to the wall. If that doesn’t work, try moving the level across the floor to discover the lowest place. Use a nail to attach a scrap of baseboard to the wall at this step.
Every few feet, make horizontal marks at the same level on the walls using this baseboard piece as a reference point.
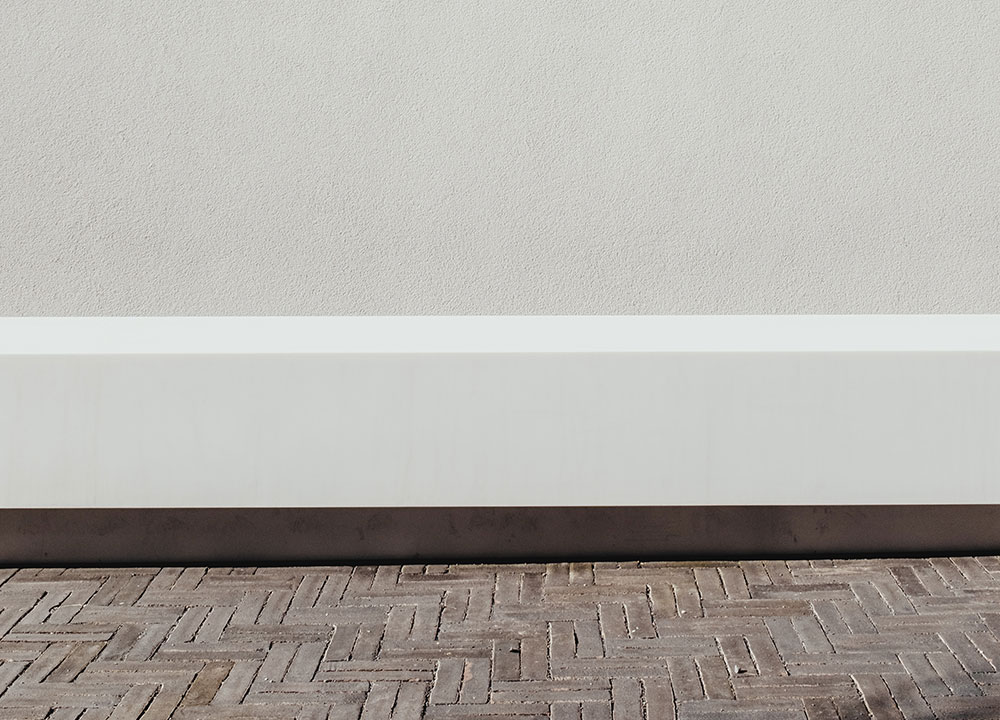
Draw a chalk line around the room to demonstrate where the top edge of all the baseboards should land during installation.
Hold the first board you want to install against the wall, level it, and then tack it in place with some nails, beginning at an inner corner.
The vertical space between the chalk line and either of the upper corners of the board should be the range of your compass’s points.
For a Tight Fit, Use a Scribe
Hold the pencil on the board and the point on the floor without adjusting the spread of the compass’s legs. Keep the compass’s points vertically aligned as you slide it across the board’s length.
Cut along the line scribed with a circular saw set to a 2- to 5-degree angle, with the cut face towards the wall.
With a block plane, bring the beveled edge to the straight edge. The top edge of the scribe baseboard should line up with the chalk line snapped in Step 2 when it is reattached to the wall.
Nail Baseboard to Wall
Incorporate the scribe baseboard.
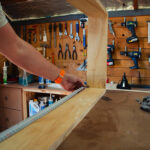
Next, nail two 8d finish nails into each stud at a slight downward angle at the top and bottom borders of the board. Drive the nail heads below the surface of wood using a nail set to avoid damaging it.
Marking Outside Joints of Corners
Draw a vertical line up the board’s back; you can use the edge of the outside corner as a guide, by pressing one end of the board against the inside corner. The top of the board should be marked to indicate the orientation of the miter.
Remove the marked board and set the second half of the miter on the wall next to it. The same rules apply.
Outside Corner Joints Miter-Cut
Cut each miter just outside the line using a compound miter saw set to 45 degrees. The joint can be fine-tuned in this way.
Examine the junction by placing both boards back up against the wall. Go back to the saw or grab a block plane if the wood isn’t tight enough on the sides and top.
Cut Biscuit Slots
Glue and Number Ten compressed-wood biscuits should be used to secure an outside miter joint. First, clamp the two boards together at the outside corners and mark the joint twice with a pencil. Be certain the marks are evenly spaced and from each other’s edges.
Remove the boards, align the biscuit joiner with the cut face, and fine-tune the fence’s depth.
Put the Biscuit Joints Together
Carpenter’s glue should be squirted into both slots and over the miter cut’s face on both halves. Afterward, insert a biscuit into each of the two boards’ slots and secure them with tape.
Using two 8-d finish nails, nail both boards back into place on the wall.
Nail on the Cap Molding
In terms of baseboard installation with cap molding, make sure the rear of the molding fits snugly against the wall before you use it. Each stud should have an 8d nail driven through the thicker parts of the molding at a modest downward angle.
Sand the Cap Molding
Remove any sharp edges by carefully sanding the mitered corners with fine sandpaper. The baseboard trim is now primed and ready to be painted.