Welcome to CondoCosmetics INC.
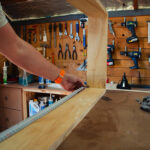
Let’s take a quick look at the Tile installation process.
Tile can be laid over if the substrate is clean, smooth, dry, and devoid of wax, soap scum, and grease.
Fix, patch, and level any uneven or damaged area.
Get rid of everything that can get in the way of the Tile installation.
The corners might be shaved to allow tile to slip under door jambs.
The first thing you need to do is mark the center point on each of the four sides.
Assemble your space by drawing a line from one wall’s center to another’s center. Check to see if they’re square, and if not, make the appropriate adjustments.
A row of loose tiles should then be laid out in both directions, allowing for uniform joint spacing between them (use tile spacers). To avoid cuts smaller than half the tile, move the centerline by half a tile closer to the wall if necessary. If necessary, repeat along the opposite centerline.
By snapping more lines parallel to the central lines, you may now split the room into smaller grids (about 2′ x 3′).
Adhesive selection is based on the substrate being used. Be sure to read and heed the warnings and directions on the adhesive or mortar package. Make only as much as you’ll need in the next 30 minutes.
Using the adhesive’s recommended method for application, you can use a flat side of your trowel to spread a 1/4″ coat over one grid area. Please don’t hide the rules.
Comb glue into standing ridges with a trowel notched side while holding the trowel at a 45-degree angle.
A ridged setting bed is left after excess glue has been removed.
Spread only as much as can be set up in 15 minutes or less.

Using a pencil or felt-tip pen, carefully indicate the measurements before Tile installation.
Straight or diagonal cuts can be made with a tile cutter, curved cuts with a nipper, and full-length curved cuts can be made using a rod saw.
With a carborundum stone, sharp edges can be softened and polished.
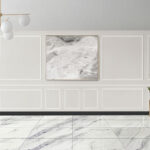
Tiles from different boxes can be used together to create a layered impression when installed.
Start by laying down tiles in the middle of the room, one at a time. Start with the first grid and work your way through it.
Work your way out from the corner of the grid, starting with the first tile.
Tile installation should be done one at a time, gently twisting each one into place as you go. Don’t slide the tiles into place.
As you place each tile, use spacers to keep them apart or leave an equal gap between them all.
Perimeter tile should be installed at the end of each grid, allowing a 1/4-inch gap between the tile and the wall.
There should be no more than a third overlap in any rectangular porcelain set in a running bond pattern; the junction should be 3/16″ broad and a large unit porcelain mortar used.
A rubber mallet or a normal hammer can be used to tap in all tiles once the grid is placed.
Using a putty knife and a wet sponge, remove excess adhesive from the joints and the tile.
Do not step on the tiles until they have been set (usually in 24 hours).
In general, you should not grout your tile until at least 24 hours have passed (refer to the adhesive package for specifics).
Ensure that you follow all instructions and warnings on the grout package before using it. Do not make more than 30 minutes’ worth of food.
Remove the tile spacers and use a rubber grout float or squeegee to spread the grout onto the tile surface. A 45-degree angle should be applied to the float.
Using the float’s edge, remove any excess grout from the surface quickly. Scrape diagonally over tiles while tilted at a 90-degree angle.
Allow the grout to sit for 15-20 minutes before using a moist sponge to remove any remaining residue and smooth the grout joints. Clean and re-hydrate the sponge as needed.
Polish with a soft cloth after the grout has dried and hardened. Use a sponge and water if needed.
After Tile installation, wait at least 72 hours and then walk on it.
Wait three weeks before using sealers or polishes, and only then if instructed to do so by the manufacturer.