Welcome to CondoCosmetics INC.
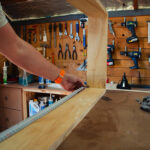
Sand the flat surfaces with 220-grit sandpaper after the primer has dried during Painting Kitchen Cabinets. Use a medium-grit sanding sponge on any profiled surfaces. Be sure to fill in any gaps by applying a thin layer of latex caulk. (A caulk tube’s tip should have a hole no larger than the tip of a sharp pencil.) Pull the caulk’s tip as you apply it, and then use a damp finger to smooth it out. Use a vinyl spackle, which can be applied to the surface with a putty knife and smoothed out with sandpaper.
To finish, use 220-grit paper, vacuum, and a tack cloth to remove the dust after the spackle has dried (about 60 minutes). Spot-prime the spackle and any areas where the sandpaper has “burned through” the primer with a spray can of fast-drying oil-based primer. After waiting an hour, lightly sand the primer with 280-grit paper to remove any surface imperfections. After vacuuming, use a tack cloth to clean all of the surfaces.

Now that you’re all set to start Painting Kitchen Cabinets, congrats! Two coats should suffice as long as you’re using the same color as the original. It’s more difficult to paint over a dark finish with a light one, and three coats may be necessary. Each coat should be applied with a new brush. Add some trim and cabinet enamel paint in a paint tray, and then load the brush and roller with paint. Leave out the roller strokes and cut in with the brush along the edges. Push the paint into the corners. Use a fine roller to apply enamel paint to a large, flat area whenever possible.
Use an ultra-fine mini roller with a smooth surface to achieve an orange-peel look on your cabinets’ insides. Wait some moments for the first coat to dry before covering the brushes and rollers with plastic bags to prevent them from hardening. Lightly sand the surfaces in between coats, removing all of the sanding dust. Recoat the cabinet if necessary. This final coat should prevent any thin or light wood areas from showing through.
It’s the same process as Painting Kitchen Cabinets, except that you work on a table instead of a counter to prevent drips, runs, and sags. Begin by painting the area around the panel first. Finally, complete the panel’s stiles and rails by completing the panel’s main field. Lap marks can be avoided and cleaned by wiping up any paint that spills onto adjacent dry surfaces as you work. Once you’ve finished painting, hang the door’s hooks on a sturdy clothes hanger and then pick up the door by the screw and the other hook.
Repair and reattach the cabinet fronts after Painting Kitchen Cabinets and when the second coat has dried. Your kitchen cabinets have a new look without much time or money spent on them. Install the hinges and knobs on each door and then hang them in the original opening they were intended for. Afterward, reinstall each drawer by replacing the drawer pulls (or adding new ones).
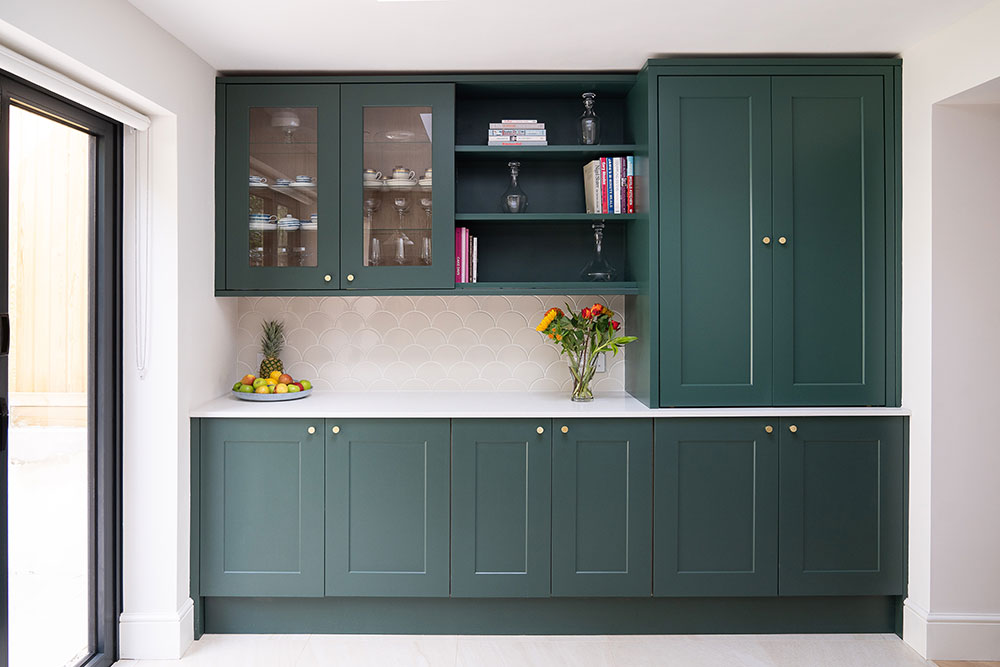
Glass-fronted cabinets and open shelving allow you to see what’s inside, which is a great benefit. However, remember that this also exposes the contents of your cabinet boxes. Interiors should be painted with care—or a different shade could be used to add mystery.